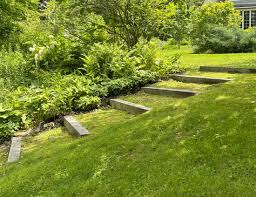
How to Lay Pavers in Your Backyard: A Step-by-Step Guide
How to Lay Pavers in Your Backyard: A Step-by-Step Guide
A beautifully paved backyard can enhance the curb appeal of your home, increase property value, and create a functional outdoor space for entertaining and relaxing. Whether you're looking to build a patio, walkway, or driveway, installing pavers is a DIY-friendly project that can transform your outdoor space. In this comprehensive guide, we will walk you through the step-by-step process of how to lay pavers in your backyard.
Step 1: Plan Your Paver Project
Before you start digging, it’s important to create a detailed plan for your project. Decide on the area you want to pave and measure the space accurately. Sketch a layout of your design and consider factors such as drainage, patterns, and materials. Choose pavers that complement your landscape and fit your style preferences.
Materials and Tools Needed:
Pavers of your choice
Measuring tape
Wooden stakes and string
Shovel
Rake
Landscape fabric
Crushed gravel
Sand
Rubber mallet
Level
Broom
Polymeric sand or jointing compound
Plate compactor or tamper
Step 2: Prepare the Ground
Proper site preparation is crucial to ensure a durable and long-lasting paver installation.
Mark the Area – Use wooden stakes and string to outline the area where you will lay the pavers.
Excavate the Area – Dig out the designated space to a depth of approximately 6 to 8 inches, depending on the type of pavers you’re using and their intended use (e.g., walkways require less depth than driveways).
Ensure Proper Drainage – Slightly slope the ground away from structures to prevent water pooling.
Step 3: Install the Base Material
The foundation of your paver project is crucial to its longevity.
Add Landscape Fabric – Lay a layer of landscape fabric over the excavated area to prevent weeds from growing between your pavers.
Spread Crushed Gravel – Pour a layer of crushed gravel (about 4 inches deep) and use a rake to distribute it evenly.
Compact the Base – Use a plate compactor or hand tamper to firmly compact the gravel layer.
Add a Layer of Sand – Spread about 1 to 2 inches of sand over the compacted gravel and level it with a screed board.
Step 4: Lay the Pavers
Now it’s time to install your pavers.
Start Laying Pavers – Begin placing pavers in your desired pattern, starting from one corner and working your way across.
Maintain Even Gaps – Keep a consistent gap (⅛ to ¼ inch) between pavers to allow for expansion and jointing material.
Tap Into Place – Use a rubber mallet to gently tap each paver into the sand base.
Check for Levelness – Periodically use a level to ensure the pavers are even.
Step 5: Secure the Pavers
After placing all the pavers, you’ll need to secure them properly.
Edge Restraints – Install plastic, metal, or concrete edging along the perimeter to hold the pavers in place.
Spread Joint Sand – Pour polymeric sand or jointing sand over the pavers and sweep it into the joints using a broom.
Compact Again – Use the plate compactor to help settle the pavers and sand into place.
Mist with Water – Lightly spray water over the area to activate the polymeric sand and help it harden.
Step 6: Final Touches
With the pavers securely in place, you can complete your project with some finishing touches.
Remove Excess Sand – Sweep away any leftover sand from the surface.
Add Landscaping Elements – Consider adding decorative rocks, plants, or outdoor furniture to enhance the look of your new space.
Regular Maintenance – Keep your pavers clean by sweeping them regularly and reapplying joint sand as needed.
Benefits of Laying Pavers in Your Backyard
Durability – Pavers are long-lasting and can withstand various weather conditions.
Easy Maintenance – Unlike concrete slabs, pavers can be replaced individually if damaged.
Increased Home Value – A well-paved backyard adds curb appeal and boosts property value.
Versatile Designs – Pavers come in various colors, shapes, and patterns, allowing for customized designs.
Conclusion
Laying pavers in your backyard is an excellent way to upgrade your outdoor space, whether for entertaining guests or simply enhancing the aesthetics of your home. With the right preparation, materials, and tools, this DIY project can be accomplished successfully. Follow the steps outlined in this guide to achieve a professional-looking paved area that you can enjoy for years to come.
For expert landscaping and paver installation services, visit Pride in Landscapes and let our team help bring your vision to life!


Comments
Post a Comment